Creating an Emux Environment With Ludus

What Is Ludus?!⌗
Ludus (https://ludus.cloud) has quickly come into the spotlight as an amazing tool for easily building, destroying, and rebuilding virtualized lab enviroments (with a general focus of offensive and defensive security) for everything from ADCS to GOAD to an Elastic Security Lab, and more. In this blog we’ll dive into a new addition, the EMUX Environment. This lab will install EMUX and run one or multiple emulated devices on Debian based hosts.
A Brief Background⌗
https://github.com/therealsaumil/emux/
Originally created by Saumil Shah (@therealsaumil), EMUX is a firmware emulation framework that allows emulation of various devices (both ARM and MIPS architectures). On the website listed above, there is a walk-through for the docker setup but in this case, we’ll be using Ludus and Proxmox which makes things more ideal for temporary labs as described above.
Why Are We Doing This?⌗
If you want to practice hacking hardware embedded systems, this is a wonderful starting point. You are provided easy emulation of disposable infrastructure that you can hack to your hearts content. If you are interesting in IoT, hardware hacking, or embedded systems, this is the place to start. And you’ll learn some over fun stuff along that way.
Getting Started⌗
I’ve decided to move forward assuming you have already setup your basic Ludus system and build the default templates. In this case we’ll only be utilizing the Debian templates. Here’s a quick outline of what we’re going to do:
- Add the EMUX role
- Create and set our range config
- Deploy the range
- Navigate to the newly created systems!
We’re not going to get into hacking each of these systems in this post but you should be off to the races once we are done. Speaking of systems, I’m sure you’re wondering what exactly it is that we are emulating. Below is a table of the devices that we are able to emulate by default.
| Number | Ludus Short Name | Full Name |
|---|---|---|
| 0 | DV-ARM | Damn Vulnerable ARM Router |
| 1 | DV-MIPSEL | Damn Vulnerable MIPS Router (Little Endian) |
| 2 | DV-MIPSEB | Damn Vulnerable MIPS Router (Big Endian) |
| 3 | PH0WNCTF | R0 Port Controller - Ph0wn 2021 CTF Challenge |
| 4 | TRI227WF | Trivision NC-227-WF IP Camera |
| 5 | AC15 | Tenda AC15 Wi-Fi Router |
| 6 | ARCHERC9 | Archer C9 Wi-Fi Router |
| 7 | DIR615C | D-Link DIR615C Wi-Fi Router |
| 8 | DCS935L | D-Link DCS-935L Camera |
There’s a bunch of cool stuff here, right?! My thoughts exactly. Let’s get this spun up so we can get to hacking. First things first, below are the links to other docs we are going to need as we work our way through setting all this up. These are more or less in order from where we start to where we “finish”. Again, this is going to assume that we’ve completed the basic “Build Templates” portion of the Ludus setup.
| Roles & Adding a role |
|---|
| https://docs.ludus.cloud/docs/roles |
| GIT repo for the EMUX role |
|---|
| https://github.com/badsectorlabs/ludus_emux |
| Range configuration file documentation |
|---|
| https://docs.ludus.cloud/docs/configuration |
| Deploy a range |
|---|
| https://docs.ludus.cloud/docs/quick-start/deploy-range |
That’s pretty much it. Now, in each of these there is a lot more detailed documentation that is 100000% worth familiarizing yourself with. In our case, I’m going to focus only on what we need to get the range up in a default state, however, there is a ton of other tweaks you can make if that’s your thing.
Adding A Role⌗
There are a couple ways to accomplish this as you’ll see in the Ludus docs. We can either add directly from the Ansible Galaxy or from a local directory, if we git clone the repo. In this case let’s just add from the Ansible Galaxy.
local:~$ ludus ansible role add badsectorlabs.ludus_emux

# I also like seeing what's going on in the background so we can do...

local:~$ ludus ansible role add badsectorlabs.ludus_emux --verbose

# For role updates we'll run. This will re-add with updates applied.

local:~$ ludus ansible role add badsectorlabs.ludus_emux --force --verbose
Once we’ve run this command, if verbose is set, this is the output we’ll see. Otherwise you’ll just see the last line (if no verbose). You’ll see that I’m using the –force flag, this is only because I’ve already added the role to my environment so there is no need to do this for the initial setup.
local:~$ ludus ansible role add badsectorlabs.ludus_emux --verbose --force
[DEBUG] 2024/06/22 22:10:06 ludus/cmd.initConfig:root.go:104 No config file found - using defaults
[DEBUG] 2024/06/22 22:10:06 ludus/cmd.initConfig:root.go:106 --- Configuration from cli and read from file ---
[DEBUG] 2024/06/22 22:10:06 ludus/cmd.initConfig:root.go:108 	json = %!s(bool=false)
[DEBUG] 2024/06/22 22:10:06 ludus/cmd.initConfig:root.go:108 	url = https://198.51.100.1:8080
[DEBUG] 2024/06/22 22:10:06 ludus/cmd.initConfig:root.go:108 	proxy =
[DEBUG] 2024/06/22 22:10:06 ludus/cmd.initConfig:root.go:108 	verify = %!s(bool=false)
[DEBUG] 2024/06/22 22:10:06 ludus/cmd.initConfig:root.go:108 	user =
[DEBUG] 2024/06/22 22:10:06 ludus/cmd.initConfig:root.go:108 	verbose = %!s(bool=true)
[DEBUG] 2024/06/22 22:10:06 ludus/cmd.initConfig:root.go:117 ---
[DEBUG] 2024/06/22 22:10:06 ludus/cmd.initConfig:root.go:131 Got API key: mooody.***REDACTED***
[DEBUG] 2024/06/22 22:10:06 ludus/rest.InitClient:restapi.go:46 Endpoint URL:  https://198.51.100.1:8080
[DEBUG] 2024/06/22 22:10:06 ludus/rest.InitClient:restapi.go:56 Endpoint SSL Verify:  false
⠹ Waiting for server...2024/06/22 22:10:08.955897 DEBUG RESTY
==============================================================================
~~~ REQUEST ~~~
POST  /ansible/role  HTTP/1.1
HOST   : 198.51.100.1:8080
HEADERS:
	Accept: application/json
	Content-Type: application/json
	User-Agent: ludus-client/v1.4.2+1e8a1bc
	X-Api-Key: mooody.***REDACTED***
BODY   :
{
   "role": "badsectorlabs.ludus_emux",
   "force": true,
   "version": "",
   "action": "install"
}
------------------------------------------------------------------------------
~~~ RESPONSE ~~~
STATUS       : 201 Created
PROTO        : HTTP/2.0
RECEIVED AT  : 2024-06-22T22:10:08.955851919-04:00
TIME DURATION: 2.274334643s
HEADERS      :
	Content-Length: 61
	Content-Type: application/json; charset=utf-8
	Date: Sun, 23 Jun 2024 02:10:08 GMT
BODY         :
{
   "result": "Successfully installed: badsectorlabs.ludus_emux"
}
==============================================================================
[INFO]  2024/06/22 22:10:08 Successfully installed: badsectorlabs.ludus_emux
Excellent, now we have the role added. Once again, assuming we’ve built our templates, it’s now time to create our config. We’ll discuss two was to deploy this range. The first, deploying a single machine to emulate a single device. The second, deploy nine (9) machines that will each emulate a single device. Technically it will be two (2) or ten (10) machines respectively as one machine will act as the router. We’re going to make a pretty straight forward config file and then set it to be used when the machines are deployed.
The following will be our single device configuration file. It’s important to refer to the Ludus EMUX git page or the table above to choose the number that corresponds with the device you are trying to emulate. This number will need to be entered under role_vars -> ludus_emux_device: number. These numbers will currently range from zero-eight (0-8). In this example we’ll use four (4).
ludus:
  - vm_name: "{{ range_id }}-EMUX"
    hostname: "{{ range_id }}-emux"
    template: debian-12-x64-server-template
    vlan: 10
    ip_last_octet: 4
    ram_gb: 4
    cpus: 2
    linux: true
    roles:
      - badsectorlabs.ludus_emux
    role_vars:
      ludus_emux_device: 4
Now, let’s say you happen to want to spin up all the things. The following is a config that I use. Note that there are a few things here that you must change in order for this to work properly. (they are changed already in the following config, it’s ready to use.) First, you’ll need to choose a different ip_last_octet: for each. You’ll end up with something like 10.5.10.4 in the example above. You’ll also need to add something to the vm_name and the host_name. In my case I just add numbers that iterate up. And lastly, as mentioned, you’ll need to change each of the ludus_enux_device numbers to iterate from zero-eight (0-8).
For simplicity sake I use the number of the device in the VM/Hostnames. If you’re wondering, I just don’t like starting with .1 so I went with .3 instead. Whatever you want will work, but best to make it easy on yourself. Ah and one last thing, you’ll use your CLI editor of choice to create a file called ludus-range-config.yml. Within that file, paste your config. (you only need ludus: once, at the top. don’t be like me and try and put it before every machine in the config. We live and learn…)
ludus:
  - vm_name: "{{ range_id }}-EMUX0"
    hostname: "{{ range_id }}-emux0"
    template: debian-12-x64-server-template
    vlan: 10
    ip_last_octet: 3
    ram_gb: 4
    cpus: 2
    linux: true
    roles:
      - badsectorlabs.ludus_emux
    role_vars:
      ludus_emux_device: 0

  - vm_name: "{{ range_id }}-EMUX1"
    hostname: "{{ range_id }}-emux1"
    template: debian-12-x64-server-template
    vlan: 10
    ip_last_octet: 4
    ram_gb: 4
    cpus: 2
    linux: true
    roles:
      - badsectorlabs.ludus_emux
    role_vars:
      ludus_emux_device: 1

  - vm_name: "{{ range_id }}-EMUX2"
    hostname: "{{ range_id }}-emux2"
    template: debian-12-x64-server-template
    vlan: 10
    ip_last_octet: 5
    ram_gb: 4
    cpus: 2
    linux: true
    roles:
      - badsectorlabs.ludus_emux
    role_vars:
      ludus_emux_device: 2

  - vm_name: "{{ range_id }}-EMUX3"
    hostname: "{{ range_id }}-emux3"
    template: debian-12-x64-server-template
    vlan: 10
    ip_last_octet: 6
    ram_gb: 4
    cpus: 2
    linux: true
    roles:
      - badsectorlabs.ludus_emux
    role_vars:
      ludus_emux_device: 3

  - vm_name: "{{ range_id }}-EMUX4"
    hostname: "{{ range_id }}-emux4"
    template: debian-12-x64-server-template
    vlan: 10
    ip_last_octet: 7
    ram_gb: 4
    cpus: 2
    linux: true
    roles:
      - badsectorlabs.ludus_emux
    role_vars:
      ludus_emux_device: 4

  - vm_name: "{{ range_id }}-EMUX5"
    hostname: "{{ range_id }}-emux5"
    template: debian-12-x64-server-template
    vlan: 10
    ip_last_octet: 8
    ram_gb: 4
    cpus: 2
    linux: true
    roles:
      - badsectorlabs.ludus_emux
    role_vars:
      ludus_emux_device: 5

  - vm_name: "{{ range_id }}-EMUX6"
    hostname: "{{ range_id }}-emux6"
    template: debian-12-x64-server-template
    vlan: 10
    ip_last_octet: 9
    ram_gb: 4
    cpus: 2
    linux: true
    roles:
      - badsectorlabs.ludus_emux
    role_vars:
      ludus_emux_device: 6

  - vm_name: "{{ range_id }}-EMUX7"
    hostname: "{{ range_id }}-emux7"
    template: debian-12-x64-server-template
    vlan: 10
    ip_last_octet: 10
    ram_gb: 4
    cpus: 2
    linux: true
    roles:
      - badsectorlabs.ludus_emux
    role_vars:
      ludus_emux_device: 7

  - vm_name: "{{ range_id }}-EMUX8"
    hostname: "{{ range_id }}-emux8"
    template: debian-12-x64-server-template
    vlan: 10
    ip_last_octet: 11
    ram_gb: 4
    cpus: 2
    linux: true
    roles:
      - badsectorlabs.ludus_emux
    role_vars:
      ludus_emux_device: 8
Sweet! We’re almost to the hacking! Now that that is done, all that’s left is to set the config and let the range build. To set your config you’ll use the following command and should see the output below.
local:~$ ludus range config set -f ludus-range-config.yml
[INFO]  Your range config has been successfully updated.
Let’s build this thing! Remember, this can take a little bit of time depending on how many machines you decide to build. I find that it’s best to just follow the logs as the build, because it’s fun to watch it, and because you’ll know when it’s done. You’ll enter the following to build and see the output below!
local:~$ ludus range deploy
[INFO]  Range deploy started
I won’t paste the entire output of the logs but we’ll look at the command to follow and the end of the output so you know when it’s done. Enter the following and then watch the magic happen. The output below the command will be what you see when the build finishes. This output will vary depending on the number of machines you deploy. What we see below is the result of a single machine being built. (remember that it also builds the router. It will only build one router no matter how many machines you deploy)
local:~$ ludus range logs -f

# When the build finishes you'll see this...

PLAY RECAP *********************************************************************
localhost                  : ok=39   changed=9    unreachable=0    failed=0    skipped=38   rescued=0    ignored=0
mooody-EMUX4               : ok=54   changed=32   unreachable=0    failed=0    skipped=52   rescued=0    ignored=0
mooody-router-debian11-x64 : ok=38   changed=14   unreachable=0    failed=0    skipped=4    rescued=0    ignored=0
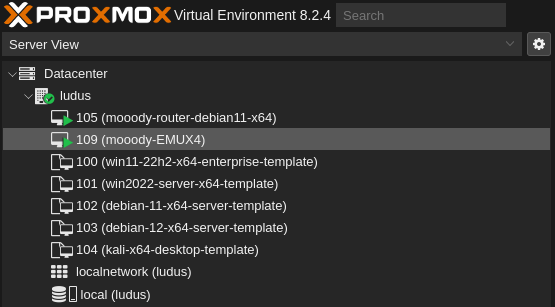
Will you look at that! We did it! Don’t worry about the number to the left of the machine, this will vary based on other things but doesn’t matter. If you happened to deploy ALL the machines, you’ll see a lot more here!
One quick note, if you need to login directly to any of these boxes (not the emulated device itself) the username and password will be debian:debian. This information can also be found in the Ludus EMUX git repo but as a quick reference, ports from the emulated device are generally mapped 1:1 with the exception of SSH(22) where 2222 will be used to ssh into the emulated device. Again though, to get onto the machine that is emulating the device, you’ll use 22.
Now let’s take a quick look and verify that everything worked. Remember, each machine will have different ports/services/etc as these are various emulated devices. In this example we’ll use a device that has port 80 open and a login panel available to us for the device being emulated. A quick nmap scan shows the open ports of the emulated device (and 22 for the Debian host). Navigating to port 80 on the IP of the host (10.5.10.4 in this case) we see the login page for the device! Winning!
local:~$ nmap 10.5.10.4
Starting Nmap 7.93 ( https://nmap.org ) at 2024-06-25 15:52 EDT
Nmap scan report for 10.5.10.4
Host is up (0.00012s latency).
Not shown: 993 closed tcp ports (reset)
PORT     STATE SERVICE
22/tcp   open  ssh
23/tcp   open  telnet
80/tcp   open  http
443/tcp  open  https
2222/tcp open  EtherNetIP-1
8080/tcp open  http-proxy
9999/tcp open  abyss

Nmap done: 1 IP address (1 host up) scanned in 0.11 seconds

Conclusion⌗
Not so bad, right? From this point forward you can start hacking away at these devices. Approach them methodically as you would any device/environment. If you break something, just remove, redeploy and you’re back in action. That reminds me, as a quick note, there are two ways to remove/destroy the range. You can manually remove them from Proxmox, or in your Ludus host terminal, you can run the following command
local:~$ ludus range rm
[WARN]
!!! This will destroy all VMs for the range of user ID: mooody !!!

Do you want to continue? (y/N):
y
[INFO]  Range destroy in progress
Simple as that! There’s documentation out there for all the devices that are being emulated as well as write-ups and exploits. Do the research and you’ll be rewarded with a ton of great information and experience. Feel free to reach out if you have any questions or thoughts. The Ludus crew also have a discord server that can be found on their main site http://ludus.cloud Enjoy!